Showing posts with label Motorcycle. Show all posts

Sunday, February 2, 2020

EZ-RIDER - Front Caliper Short Slide Pin **REFURB**


She Ain't Pretty She Just Looks That Way


Finding parts for EZ-RIDER, a Japanese Edition of a relatively small displacement motorcycle (VT250CR / M29) has proven to be a somewhat "challenging" task.  

I find myself slowly being forced into the position where I must refurbish parts that I might otherwise prefer to replace, because my motorcycle is not as popular and accessible as other models.


Case in point is the parts needed to refurbish the front brake calipers, which I believe includes the following parts:

1 064510-GE2-405 SEAL SET, PISTON
4 43353-461-771 CAP, BLEEDER
6 45108-ML7-922 SPRING, PAD (NISSIN)
8 45112-MS9-611 RETAINER
9 45131-ML7-921 BOLT A, PIN
10 45131-166-016 BOLT, PIN
11 45132-166-016 BOOT, PIN BUSH (NISSIN)
12 45133-MA3-006 BOOT B
14 45203-MG3-016 PLUG, PIN
15 45215-ML7-922 PIN, HANGAR

Some of these parts are available - some not so.

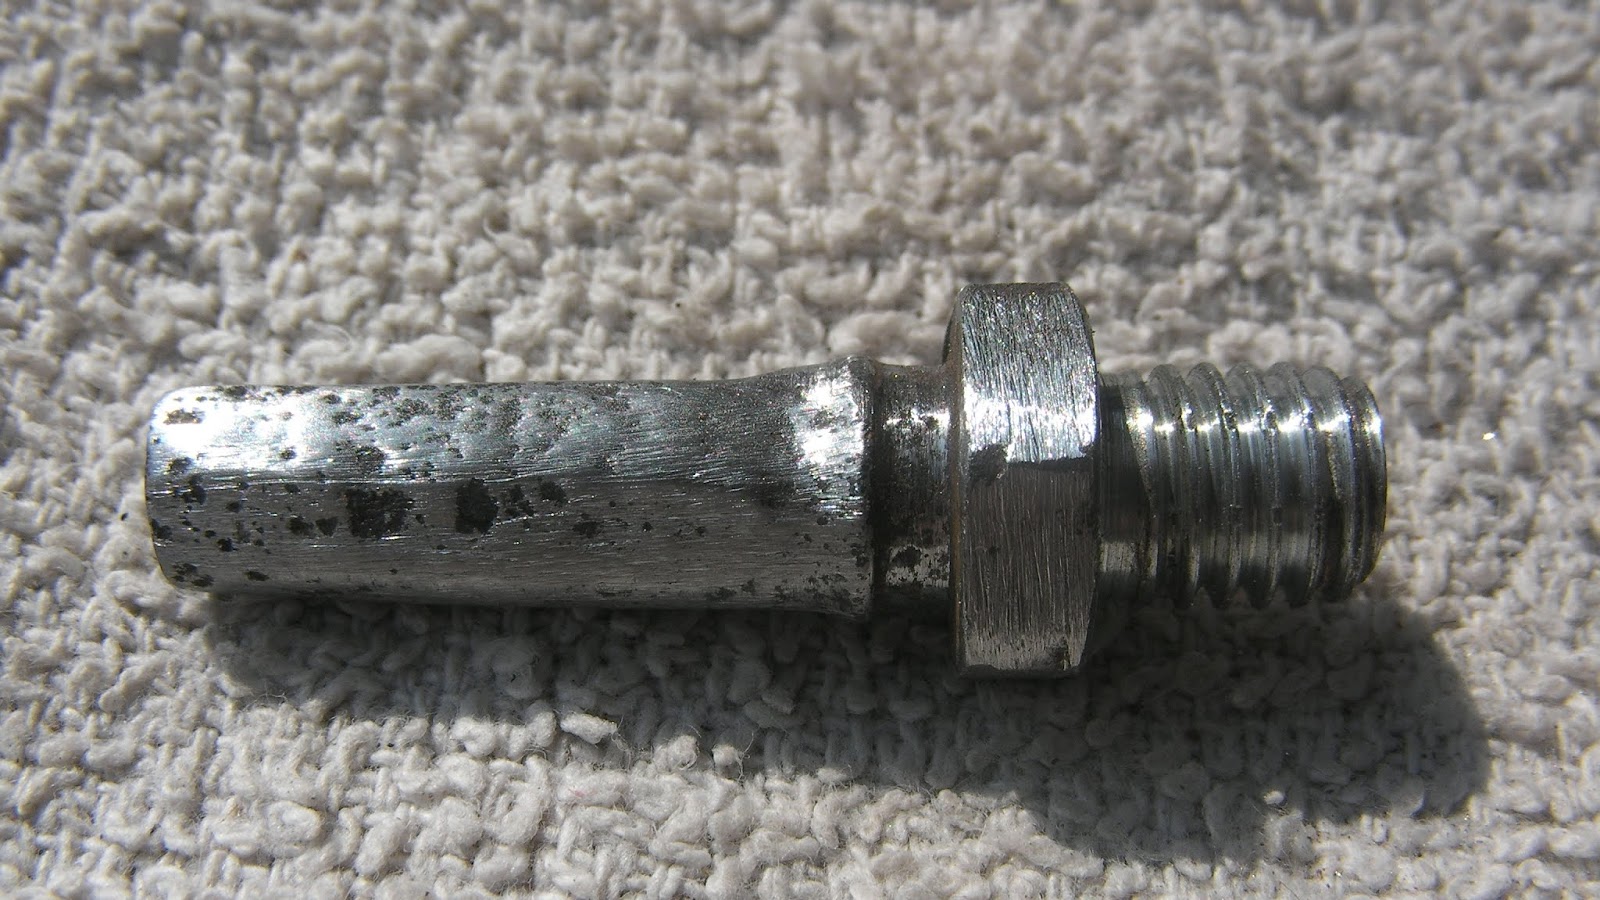
One part that seems to be a little on the hard side to source is #10 (45131-166-016) a PIN BOLT that functions as one of the two major caliper slide pins.

When I took the front calipers of EZ-RIDER apart, this bolt was in absolutely horrible shape:


Well, seeing as everything is closed in Hong Kong and I have a need for this part to be serviceable, I took it upon myself to try to refurbish this part of the front calipers, and see what could be done to bring it back into service.  

Enjoy!


Help a Maker Out?


Did you see anything in this video you want for yourself?  If the answer is yes, consider using one of the link(s) below to buy it directly from amazon.com.  When you do, I get a small commission that keeps me going!


Bill of Materials


GLOVEWORKS HD Industrial Black Nitrile Gloves - 6 mil, Latex Free, Powder Free, Diamond Texture, Disposable, Large, GWBN46100-BX, Box of 100
https://amzn.to/35fifrv

WD-40 Multi-Use Product Non-Aerosol Trigger Pro Spray. 20 oz. [1-Pack]
https://amzn.to/30h2nmN

Mazbot 6" Cushion Comfort Foam Grip Beading Awl
https://amzn.to/2ZjDwOL

BLACK+DECKER RTX-6 2 Amp 3-Speed Rotary Tool
https://amzn.to/2rHBJ9S

Dry Wet Sandpaper by Heylure, 45PCS 9 x 3.6" Silicon Carbide, 120 to 5000 Grit Sandpaper Sheets Assortment, for Metal Sanding, Automotive Polishing, Wood Furniture, Wood Turning Finishing
https://amzn.to/36AhUj5

Utopia Towels 12 Pack Dish Towels, 15 x 25 Inches Ultra Soft Cotton Dish Cloths, Blue

https://amzn.to/34rdwC1


Saturday, February 1, 2020

EZ-RIDER - The Delicate Art of Caliper Piston Polishing


Caliper Piston Polishing - Why Not?


As I strive to bring EZ-RIDER back from the brink of oblivion, part of the effort is to try to save as many of the original parts as possible.  

There are many reasons for doing this, but here's my top 3:

- If you replace before trying to fix, you're doing it wrong
- If you fix and then have no choice but to replace later, you're doing it right
- if your fix means you never have to replace, you get to brag and get more stuff

So, there's really no reason why I shouldn't do my best to fix as much of the front brake calipers on EZ-RIDER as I can, which includes (of course) its two pistons - each of which represents one of the most expensive parts of the brake assembly.

The most difficult part of refurbishing the pistons was getting them out - they were completely rusted/seized in place and therefore extremely difficult to manipulate, with only about 5mm of their lip showing.  Copying a technique I saw on YouTube, I used my channel lock pliers to pull them out, but there are some other techniques in existence that someone interested in following my footsteps may be interested in knowing:

1) Some people use piston pliers.  There are specialized piston pliers available that use outward pressing force inside the hollow piston give a person a way to work them out of place.  I have a pair of these pliers on order, but I still don't have the experience of using them, so I cannot speak to their effectiveness.  One thing I know for sure is they won't damage the outer surface of the piston because they do not touch it.  A potential downside is the fact that the clearances in the caliper are very tight, so they may not be usedful to pull the pistons all of the way out.

2) Some people use the braking system itself.  They just remove the brake pads and then pump the brakes to use the brake fluid to pop the pistons out.  This seems like a great way to get the pistons out, but I think it would probably be very messy, so precautions should be taken to prevent brake fluid (which is pretty corrosive) from flying everywhere.  Still, this is a very popular method.

3) Some people use compressed air.  They hook up compressed air to the brake line and use air pressure to eject the pistons.  Putting a piece of wood in the impact area is a good idea, and if you have a multi-piston system, you need to figure out a way to work the pistons out in a way that doesn't eject one piston prematurely, leaving the other stranded in the caliper.

4) Some people use pliers on the top of the piston and just work them out as best they can, inflicting as little damage as possible aside from the lip area, because the main seal of the calipers is well into the caliper body.

In my case I (1) Didn't have the pliers; (2) Had already taken the brakes apart; and (C) Didn't have a compressor, so I ended up using technique #4.

Enjoy!


Help a Maker Out?


Did you see anything in this video you want for yourself?  If the answer is yes, consider using one of the link(s) below to buy it directly from amazon.com.  When you do, I get a small commission that keeps me going!


Bill of Materials


GLOVEWORKS HD Industrial Black Nitrile Gloves - 6 mil, Latex Free, Powder Free, Diamond Texture, Disposable, Large, GWBN46100-BX, Box of 100
https://amzn.to/35fifrv

WD-40 Multi-Use Product Non-Aerosol Trigger Pro Spray. 20 oz. [1-Pack]
https://amzn.to/30h2nmN

Bondhus 22199 Hex L-wrench DoublePK,Long Length,12137 .050-3/8" & 12199 1.5-10mm
https://amzn.to/2Ec80Zs

Felo 0715750274 1/2" Series 800 Slotted Screwdriver, 8"
https://amzn.to/365QQYO

Disposable Chopsticks, pack of 40 pair
https://amzn.to/3979cLK

Mazbot 6" Cushion Comfort Foam Grip Beading Awl
https://amzn.to/2ZjDwOL

15 pieces Scratch Brush (Stainless Steel + Brass+Nylon), AFUNTA Curved Handle Masonry Wire brush Set Bristle for Cleaning Welding Slag and Rust,5 pcs Per Type
https://amzn.to/2rvQFYK

40 Pieces - EPAuto 1/4-Inch & 3/8-Inch Drive Socket Set with 72 Teeth Reversible Ratchet
https://amzn.to/2ROLnk6

BLACK+DECKER RTX-6 2 Amp 3-Speed Rotary Tool
https://amzn.to/2rHBJ9S

PHYHOO Polishing Buffing Wheels Wool Felt Mounted Mandrel Grinding Bits Grinder Head Polish Watch Jewelry Rotary Tool Accessories Drill Tools Attachment - 1/8 Inch Shank

https://amzn.to/2vId8U7

Dry Wet Sandpaper by Heylure, 45PCS 9 x 3.6" Silicon Carbide, 120 to 5000 Grit Sandpaper Sheets Assortment, for Metal Sanding, Automotive Polishing, Wood Furniture, Wood Turning Finishing
https://amzn.to/36AhUj5

Utopia Towels 12 Pack Dish Towels, 15 x 25 Inches Ultra Soft Cotton Dish Cloths, Blue
https://amzn.to/34rdwC1

FIXKIT 7-in-1 Portable Workbench, Multifunctional Folding Work Table Scaffold/Dolly/Platform with 4 Wheels for Garage
https://amzn.to/2QVtrVE

Best Value 24-Piece Master Combination Wrench Set with Roll-up Storage Pouch | SAE 1/4” to 1”
https://amzn.to/2GyIU87

WORKPRO 4-piece Adjustable Wrench Set, Forged, Heat Treated, Chrome-plated (6-inch, 8-inch, 10-inch, 12-inch)
https://amzn.to/31765zV

Channellock 440 Tongue and Groove Pliers | 12-Inch Straight Jaw Groove Joint Plier with Comfort Grips | 2.25-Inch Jaw Capacity | Laser Heat-Treated 90° Teeth| Forged High Carbon Steel | Made in USA
https://amzn.to/2RBw7YQ

DEWALT 20V MAX Cordless Drill Combo Kit, 2-Tool (DCK240C2)

https://amzn.to/2vGXk3Y


Tuesday, January 28, 2020

EZ-RIDER - How To Reseat A Loose Sprocket Lug


I Had A Loosy Goosy Lug Nut


I came across an interesting situation the other day.


While removing the lug nuts on EZ-RIDER.   One of the five lugs that fasten the sprocket to the rear wheel came loose, with one of the nuts attached:


I finally got the nut off after soaking the nut+lug in varsol overnight, using a pair of channel pliers and my impact driver:


With the nut off of the lug, the next problem became securing it to the rear wheel hub.  All of the other lugs were secured properly, except for the one that had come loose.

Not really knowing how lugs like this are secured, I had to stop and consult some experts.  I looked online, but couldn't really find the exact right information, despite hours of searching.

Ultimately, I considered using loctite to hold the lug in place, but then a stroke of luck happened!  I was able to consult an older mechanic who lives in my neighborhood that showed me a simple and easy way to put the lug nut in.

In the end, the solution was elegant and incredibly simple.  He just put two of the nuts on the lug, tensioned them together and then, using the tensioned nuts as a temporary bolt head, tightened the lug into the hub with a wrench:


I have to admit it, it seemed so obvious after saw him do it, but I likely would not have thought of it without his showing me.  So bravo to him!  Thanks!

Enjoy!


Help a Maker Out?


Did you see anything in this video you want for yourself?  If the answer is yes, consider using one of the link(s) below to buy it directly from amazon.com.  When you do, I get a small commission that keeps me going!


Bill of Materials


GLOVEWORKS HD Industrial Black Nitrile Gloves - 6 mil, Latex Free, Powder Free, Diamond Texture, Disposable, Large, GWBN46100-BX, Box of 100
https://amzn.to/35fifrv

WD-40 Multi-Use Product Non-Aerosol Trigger Pro Spray. 20 oz. [1-Pack]
https://amzn.to/30h2nmN

15 pieces Scratch Brush (Stainless Steel + Brass+Nylon), AFUNTA Curved Handle Masonry Wire brush Set Bristle for Cleaning Welding Slag and Rust,5 pcs Per Type
https://amzn.to/2rvQFYK

TEKTON 24335 1/2" Drive Click Torque Wrench (10-150'.-Lb./13.6-203.5 Nm)
https://amzn.to/2ROLlbY

40 Pieces - EPAuto 1/4-Inch & 3/8-Inch Drive Socket Set with 72 Teeth Reversible Ratchet
https://amzn.to/2ROLnk6

BLACK+DECKER RTX-6 2 Amp 3-Speed Rotary Tool
https://amzn.to/2rHBJ9S

Dry Wet Sandpaper by Heylure, 45PCS 9 x 3.6" Silicon Carbide, 120 to 5000 Grit Sandpaper Sheets Assortment, for Metal Sanding, Automotive Polishing, Wood Furniture, Wood Turning Finishing
https://amzn.to/36AhUj5

Utopia Towels 12 Pack Dish Towels, 15 x 25 Inches Ultra Soft Cotton Dish Cloths, Blue
https://amzn.to/34rdwC1

FIXKIT 7-in-1 Portable Workbench, Multifunctional Folding Work Table Scaffold/Dolly/Platform with 4 Wheels for Garage
https://amzn.to/2QVtrVE

Best Value 24-Piece Master Combination Wrench Set with Roll-up Storage Pouch | SAE 1/4” to 1”
https://amzn.to/2GyIU87

WORKPRO 4-piece Adjustable Wrench Set, Forged, Heat Treated, Chrome-plated (6-inch, 8-inch, 10-inch, 12-inch)

https://amzn.to/31765zV

Channellock 440 Tongue and Groove Pliers | 12-Inch Straight Jaw Groove Joint Plier with Comfort Grips | 2.25-Inch Jaw Capacity | Laser Heat-Treated 90° Teeth| Forged High Carbon Steel | Made in USA
https://amzn.to/2RBw7YQ

DEWALT 20V MAX Impact Driver Kit, 1/4-Inch (DCF885C1)
https://amzn.to/2uGz3dM


Sunday, January 26, 2020

EZ-RIDER - Chain & Sprockets Removal


A Panoply of Challenges


After I decided to remove the sprocket from the rear wheel, it was only natural that I would want to remove the front sprocket and the chain.  Here's some of the things that I found out along the way:

Chain

The VT250CR chain is pretty high-tech.  It's a size that's designed for a nice balance between weight and power, and it features some advanced technology to make it long-lasting.  The VT250CR has a 520 type chain, which means:


- There is a 5/8 of an inch gap between the side plates, to accomodate at fairly thick front and rear sprocket

- The teeth of the sprockets are 1/4 of an inch wide, so the gaps between the rivets on the chain are also 1/4 of an inch from pin-to-pin

- The VT250CR chain features o-rings between the side plates and the rollers, which helps to reduce wear and increase the life of the chain

Small Sprocket

The small sprocket is also fairly high-tech, and it connects directly to the engine of the VT250CR and it has the following characteristics: 

- It is stamped 14T, which means it has fourteen teeth
- It is rubber sided, to reduce rattle & vibration
- It uses a very large diameter washer
- It features  14mm bolt @ 40lbs

Large Sprocket

The large sprocket is a piece of stamped metal with the following characteristics:

- It has a 80mm center hole
- It is stamped 38T, which means it has thirty-eight teeth
- It is secured by 5 Bolts spaced at 64mm

This means that the VT250cR has 14:38 (7:19) gearing.


Help a Maker Out?


Did you see anything in this video you want for yourself?  If the answer is yes, consider using one of the link(s) below to buy it directly from amazon.com.  When you do, I get a small commission that keeps me going!


Bill of Materials

GLOVEWORKS HD Industrial Black Nitrile Gloves - 6 mil, Latex Free, Powder Free, Diamond Texture, Disposable, Large, GWBN46100-BX, Box of 100
https://amzn.to/35fifrv

TEKTON 24335 1/2" Drive Click Torque Wrench (10-150'.-Lb./13.6-203.5 Nm)

https://amzn.to/2ROLlbY

40 Pieces - EPAuto 1/4-Inch & 3/8-Inch Drive Socket Set with 72 Teeth Reversible Ratchet

WD-40 Multi-Use Product Non-Aerosol Trigger Pro Spray. 20 oz. [1-Pack]
https://amzn.to/30h2nmN

Felo 0715750274 1/2" Series 800 Slotted Screwdriver, 8"
https://amzn.to/365QQYO


Saturday, January 25, 2020

EZ-RIDER - Front Calipers Disassembly


The Calipers From HELL Finally Surrender!


After three years of being abandoned in the bush and who knows how many years of neglect beforehand, the front calipers finally surrendered to disassembly!

When it came to these calipers, everything that could have been rusty was rusty.  If it was supposed to slide, it was seized.  If it was subject to rot, then it was rotted.    Everything that could have possibly been perished was perished.  In short, they were a complete and total mess!  

After hours of puzzling over how to get them apart, they have finally come apart, but not without some concerns:

- ALL of the rubber parts that composed these calipers were perished
- Everything that could have possibly rusted was totally rusted.
- Everything that was supposed to move was stuck fast.

The three hardest parts of the disassembly were:

1) Initially getting the mounting arm off of the caliper body
2) Getting the hangar pin cover out
3) Getting the pistons out

In all three cases, damage to the calipers was very possible - and in the case of the pistons it may be the case that they are damaged beyond the point of re-use.  My intention is to sand them down and make them smooth again with #600 and #1000 grit sandpaper, so we shall see how that goes in a future video

But for now, enjoy the video of how I got the front calipers apart, which was a triumph in and of itself.


Help a Maker Out?


Did you see anything in this video you want for yourself?  If the answer is yes, consider using one of the link(s) below to buy it directly from amazon.com.  When you do, I get a small commission that keeps me going!


Bill of Materials


Bondhus 22199 Hex L-wrench DoublePK,Long Length,12137 .050-3/8" & 12199 1.5-10mm
https://amzn.to/2Ec80Zs

WD-40 Multi-Use Product Non-Aerosol Trigger Pro Spray. 20 oz. [1-Pack]
https://amzn.to/30h2nmN

GLOVEWORKS HD Industrial Black Nitrile Gloves - 6 mil, Latex Free, Powder Free, Diamond Texture, Disposable, Large, GWBN46100-BX, Box of 100
https://amzn.to/35fifrv

Felo 0715750274 1/2" Series 800 Slotted Screwdriver, 8"
https://amzn.to/365QQYO

Mazbot 6" Cushion Comfort Foam Grip Beading Awl
https://amzn.to/2ZjDwOL

15 pieces Scratch Brush (Stainless Steel + Brass+Nylon), AFUNTA Curved Handle Masonry Wire brush Set Bristle for Cleaning Welding Slag and Rust,5 pcs Per Type
https://amzn.to/2rvQFYK

Friday, January 17, 2020

EZ-RIDER - **VANDALISM** -- This Bike Needs To Be Moved NOW!!!

Someone is HURTING the 12 cent motorcycle ================================= In this video I discuss why EZ-RIDER urgently needs to be relocated - I found it on its side this


EZ-RIDER - A New **HONDA** Branded Cover!

This was my very first online purchase for the 12¢ motorcycle. A **HONDA** branded cover to both protect it from the elements and prevent BOTH the curious and the malevolent from messing with it. I bought the cover on Carousell, an online marketplace that is somewhat like eBay here in Hong Kong. It was very inexpensive. The cover turned out to be very nice and it was a perfect fit!


Thursday, January 16, 2020

EZ-RIDER - Spark Plugs **REDUX** [Solved]


Top Tip:  Use the Right Sized Socket


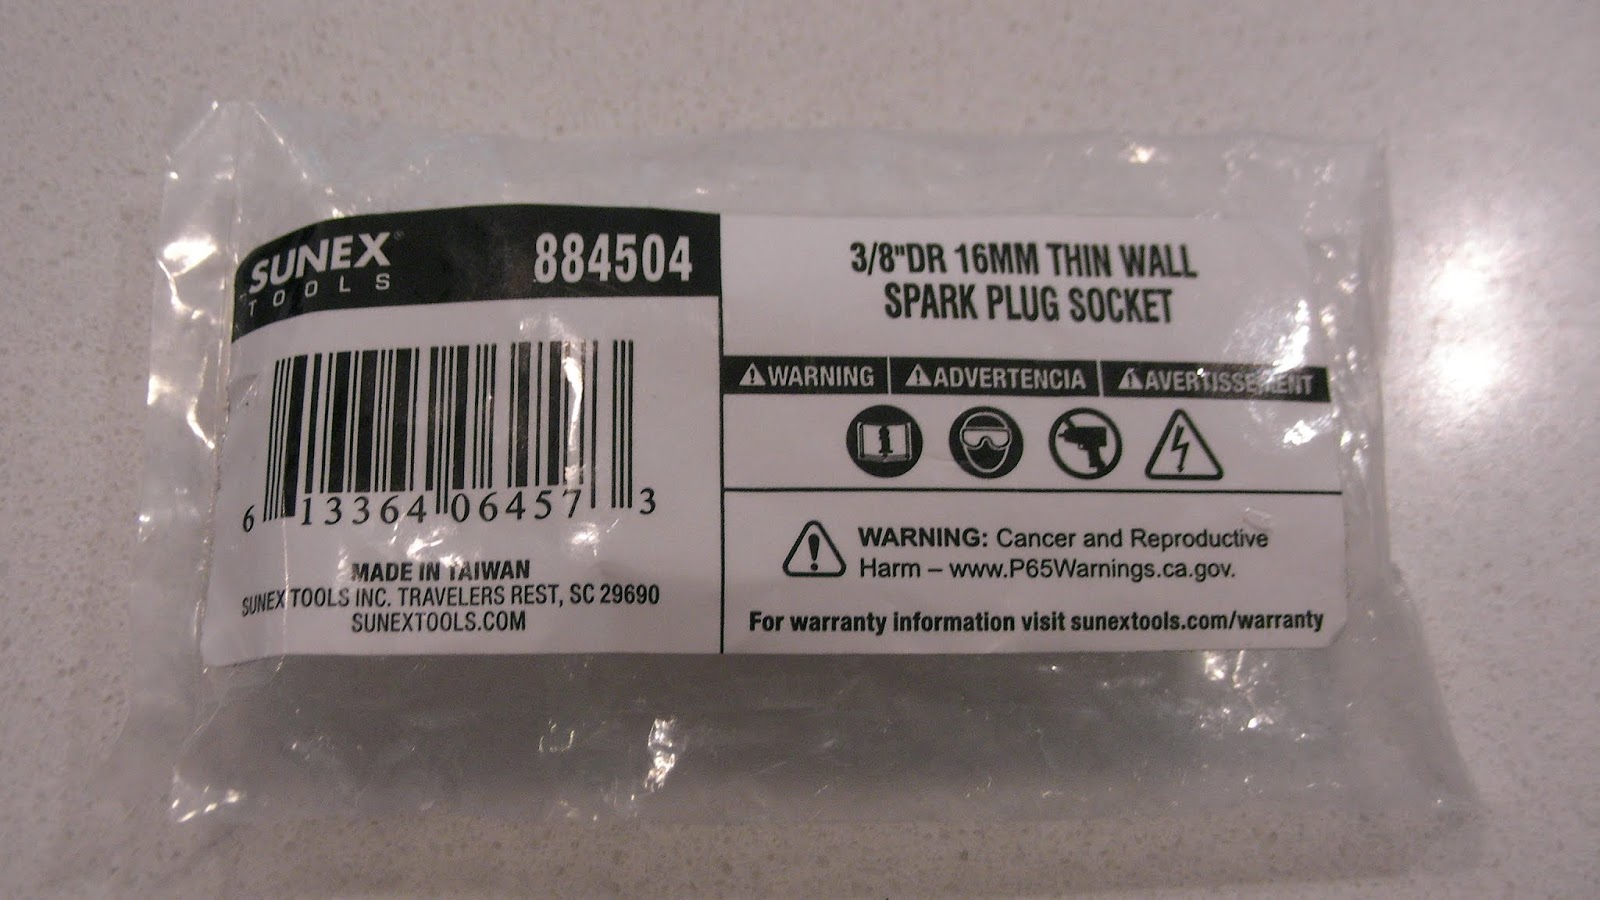
My first attempt to remove the spark plugs in EZ-RIDER ended in ignominious failure, with the spark plug socket I had purchased as part of a generic socket set completely the wrong size.  


As it turns out, a 16mm thin wall socket is required to fit in the tight places of the 1997 Honda Magna VT250CR motorcycle engine, and I simply didn't have the right socket!  The socket that came with the set I bought was totally the wrong size...it was 21mm!  Not even close!

So, after a little bit of a search on Amazon, I found the right socket - then I had to wait.

Once the socket arrived, I was able to get to work.

So I took the two spark plugs:


The copper grease:


And the 16mm thin wall socket:


and brough them all together to change out the spark plugs!


Post Install Comments:


Changing the spark plugs was actually pretty uneventful in the end.  

- The REAR spark plug is very easy to get at.  

- The FRONT spark plug is not easy to get at.  You need to remove the radiator, which is a big job.  I should have also removed the lower radiator mount as well, because it got in the way and for the little bit of extra work I should have removed it.  But, in the end, the plugs were changed in under an hour. 


Old Spark Plug Condition


For those who are interested, here's what the old spark plugs looked like:


REAR spark plug, FRONT spark plug

Lizard!


Though it has nothing to do with changing spark plugs, one of the highlights of the job was the lizard that's decided he's going to live in EZ-RIDER, and who made it clear that this bike was his now!


The lizard shows up a couple of times when I put the REAR spark plug and its boot back in, and I took some still shots that appear at the end of the video.

Enjoy!


Help a Maker Out?


Did you see anything in this video you want for yourself?  If the answer is yes, consider using one of the link(s) below to buy it directly from amazon.com.  When you do, I get a small commission that helps me to keep going!


Bill of Materials

NGK (5666) CR8EH-9 Standard Spark Plug, Pack of 1
https://amzn.to/2Sb1Ocj

LA-CO EZ Break Copper Grade Antiseize Paste, 1800 Degree F Temperature, 10 oz Jar with Brush in Cap
https://amzn.to/2PerUZZ

Sunex 884504 3/8-Inch Drive Thin Wall, Metric, Spark Plug Socket, CR-MO
https://amzn.to/2MflpEq


Wednesday, January 15, 2020

EZ-RIDER **RAD** REFURB!!


Why NOT Refurbish?


Having pulled EZ-RIDER's radiator off to get at the front spark plug, I decided to take some time to refurbish it instead of just slapping it back in place.  Everything on EZ-RIDER is in need of attention, and I figured that I would eventually get called to look at that part of the motorcycle again anyways.

Here's what it looked like just before I took it off:


Here's the video of me taking the radiator off:


Post Removal


Once I got the radiator off:

- I flushed it out.  

- I washed it.  

- I power-washed it.

- I sanded it

- I inspected it

- Where it looked like it was black before, I re-painted it flat black

- Where it looked like it was silver before, I cleaned off the grime and polished it.

- Wherever I could, I replaced the mounting hardware.


Concerns


Electrical:

With respect to electrical, wherever I could, I made sure the electrical connections were working, but I have the following concern:

- The fan does not spin as freely as I would like it to.  Its bearings are dirty.

The fan is definitely going to need some attention with some kind of lubricating oil and an external 12v power supply.  That's probably enough content to shoot a short video about...so stay tuned!

Circulatory, Hoses & Clamps:

With respect to circulatory, hoses & clamps, things do not look OK.

- When I emptied the radiator, the coolant looked dirty

- When I flushed out the radiator, the coolant looked dirty

- The return hose leading from the bottom of the radiator appears to have a split.

- All of the cooling system hoses look suspicious and unreliable-looking.

- All of the cooling system hose clamps look suspicious and unreliable-looking.

The entire cooling system should probably have all of its hoses and clamps replaced, and at least a clean water flush applied.  That's probably enough content to shoot a short video about...so stay tuned!

Where Things Now Stand


Mechanically and cosmetically, the radiator is now looks and works as good as I can make it.


Of course, as noted above, this refurbished unit now needs to be tied into the overall cooling system, which involves hoses, at least one pump, a bunch of hose clamps, a few hose clips and a coolant overflow tank - all of which needs to be checked and verified working.

Looks like there's going to be at least three more coolant-system related videos coming, so stay tuned!

Here's the video that goes over how I refurbished the radiator:


Help a Maker Out?


Did you see anything in this video you want for yourself?  If the answer is yes, consider using one of the link(s) below to buy it directly from amazon.com.  When you do, I get a small commission that keeps me going!


Bill of Materials


Rust-Oleum 248903 Automotive 12-Ounce High Heat 2000 Degree Spray Paint, Flat Black
https://amzn.to/3996MfO


WORX WG625 20V Hydroshot Cordless Portable Power Cleaner, Black and Orange
https://amzn.to/30jMEU5

Klean-Strip Green QKGT75004 Turpentine, 1-Quart


15 pieces Scratch Brush (Stainless Steel + Brass+Nylon), AFUNTA Curved Handle Masonry Wire brush Set Bristle for Cleaning Welding Slag and Rust,5 pcs Per Type


Trident Silicone Grease Jar
https://amzn.to/2R2japl

WD-40 Multi-Use Product Non-Aerosol Trigger Pro Spray. 20 oz. [1-Pack]

https://amzn.to/30h2nmN