Robosapien V2 - RIGHT Foot PCB Fix
March 05 2013
On the main control board, the leg connectors are along the bottom.
- The RIGHT leg has seven connections
- The LEFT leg has six connections

Here's the pinouts:

Robosapien V2 - Roached RIGHT FOOT (7-Wire) Main Board Connector
The connector to the main board on my Robosapien V2 was ROACHED. Note the lower right corner of the white molded connector is totally bent from its normal shape. Sigh.
This is not looking good. Here's another pic:

After doing some very careful bending, I think I have it back in proper shape. Hope so.
Rewiring the Robosapien V2 RIGHT Foot Board (7 Wires)
Here's a picture of the Robosapien V2 RIGHT (7-Wire) Foot Board:

Here's a pic with the wires nicely stretched out for easy identification:

Question. Is it just me, or does this board seem a bit weird to you? My meaning is this: Just about every other wire entry on the Robosapien V2 robot is socketed.
Even here we have some socketed wires:
- The "AAA" battery connection is socketed (RED + BLACK)
- The "tilt" sensor is socketed (GREEN)
BUT
- The "bump" sensor on the FRONT of the foot is NOT socketed (ORANGE)
- The "bump" sensor on the BACK of the foot is NOT socketed (BLUE)
Why is some stuff socketed, and others not?
It's a little weird.
Robosapien V2 - RIGHT (7-wire) Foot Board Block Diagram
Unable to find any documentation regarding the Robosapien V2 RIGHT (7-wire) foot PCB, I created this:

<check orientation of connector with pinout order>
Here's the "As Viewed" pinout for the Robosapien V2 RIGHT (7-wire) Foot Board, from LEFT to RIGHT:- Blue or S-VCC
- Brown or lie
- Purple or GND
- Gray or F
- White or B
- Black or
- Red or BAT -
Robosapien V2 - RIGHT (7-wire) Foot Board ABUSE
As you can see, the back of the 7-wire foot board has been totally roached by some ham-fisted hobbyist, or the person who assembled the unit in the first place.CRAP quality work:

What is that? I would be embarrassed if that was the product of my labours.
Another view of the embarassingly bad quality Robosapien V2 RIGHT (7-wire) foot board:

Another view. Trying to get the right angle with the camera / flash to capture just how awful this looks.

Time to get busy.
Using a soldering iron, I removed all of the old wires and as much of the old solder as I could, but after de-soldering, the story of the Robosapien V2 RIGHT (7-wire) foot board just got worse.
The traces all DELAMINATED from the PCB. This is because:
- Whoever originally soldered the board used an iron that was too hot (very likely)
- The RIGHT foot PCB, like the Right foot wire harness, was CRAP QUALITY (likely)
- My little 40w iron was too hot (unlikely)
Here's a picture of the board with all the traces delaminating:

Another view:


Here's what the Robosapien V2 RIGHT (7-wire) Foot Board looks like when its cleaned up:
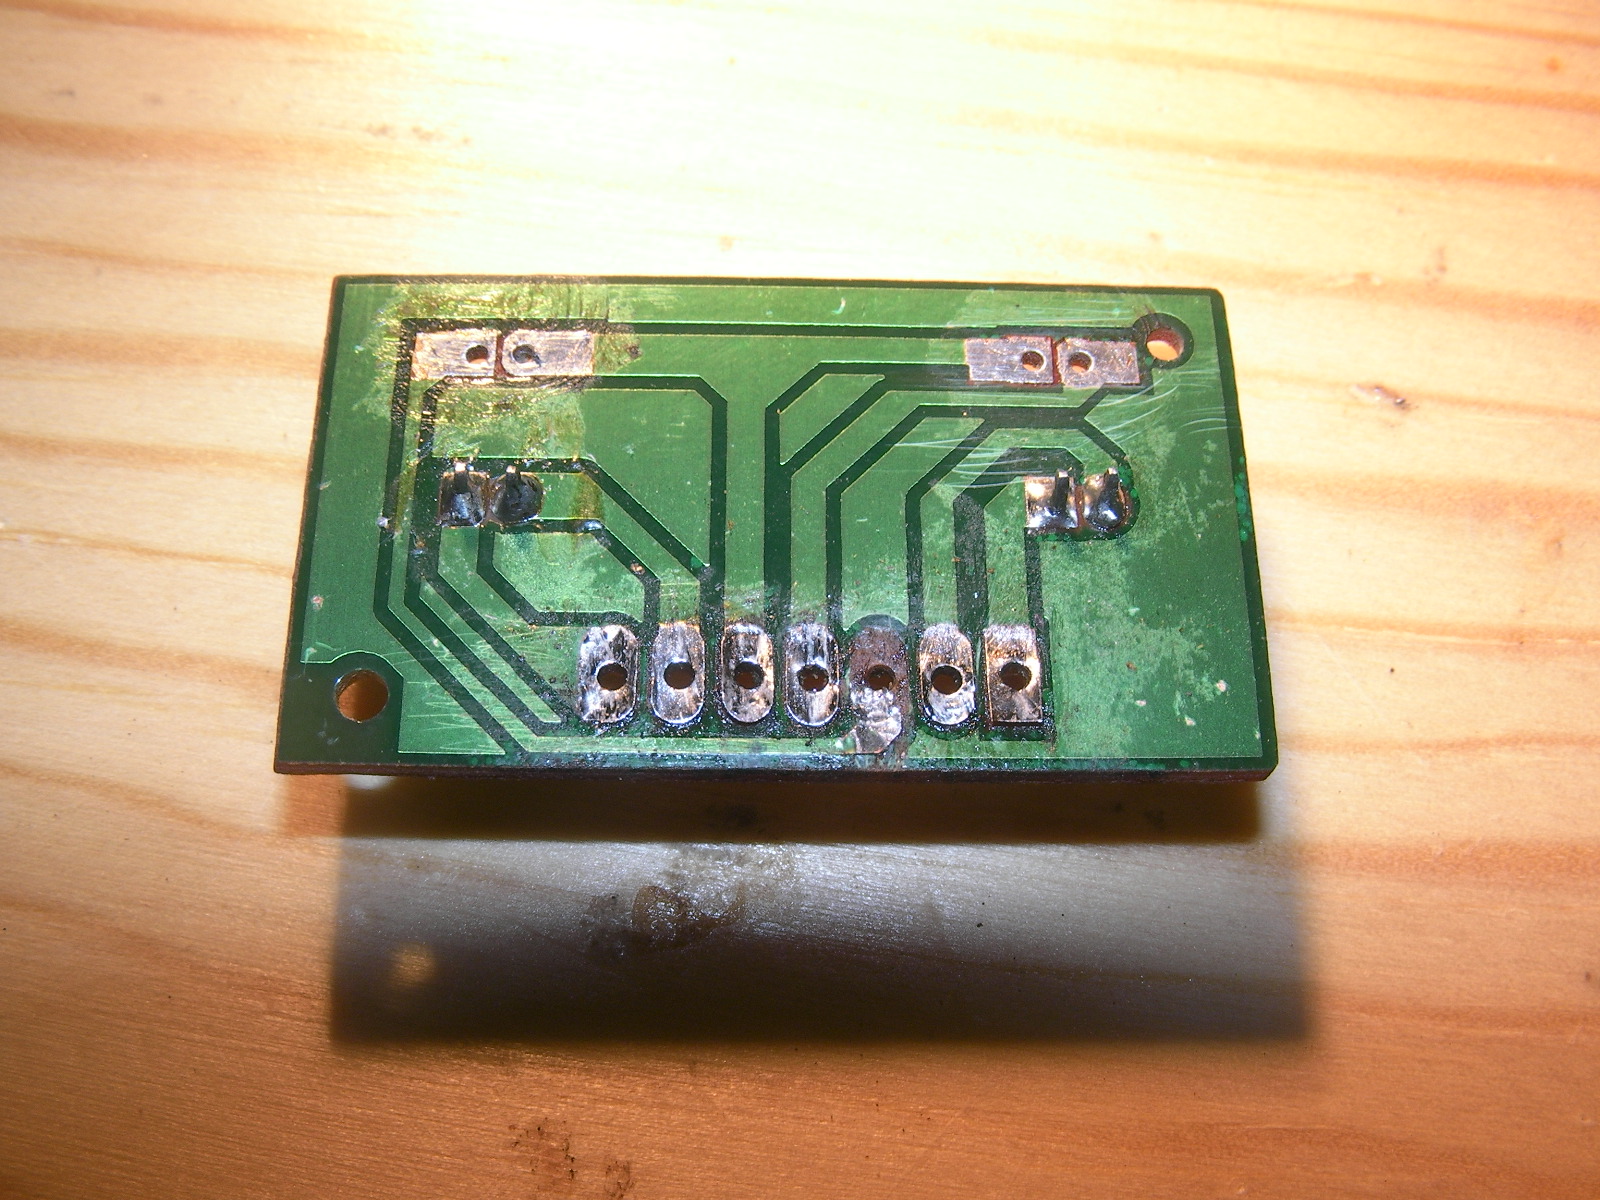
Another view:

A bunch more. I was shocked:


Robosapien V2 - 7-Wire Female Dupont Connector Workaround
Unfortunately, the electronics store I go to does not have a 7-pin Female DuPont connector.
The best I can do is a 6 pin:
The best I can do is a 6 pin:


I then installed dual pin connectors where there were directly soldered wires for the local sensors. Here's a couple of pics:


Here's the unit with the Robosapien V2 RIGHT FOOT FRONT BUMP SENSOR and the Robosapien V2 RIGHT FOOT REAR BUMP SENSOR installed.

What the Robosapien V2 RIGHT FOOT Board looks like when installed in the unit:


Robosapien V2 - Connecting the RIGHT foot (7-Wire) to the Main Board

Here's a pic of the cable connecting to the RIGHT side of the Robosapien V2 Control Board.

A close up view of the Robosapien V2 RIGHT Foot Control Cable connected to the RIGHT side of the Robosapien V2 Control Board.

Here's a pic of the cable connecting to the Robosapien V2 RIGHT Foot Board. Note the order of the wires. Apparently, the connection to the foot board is 180 degrees from the main board. Weird. I wonder if Mark intentionally designed a half twist in there for some reason?
Everything now appears to be working OK
Fixed
HI,
ReplyDeleteJust wondering which screw driver to open the body? My one is broken, I can see the leg is coming out and if I can open the body, I can easily put it back but I can not find the right screw driver to open it. any idea? thanks.
Please reply me at orlando.marcos2000@gmail.com
Regards,
Orlando
The screwdriver I used was a small Philips (cross) head. Sometimes I needed to exert a LOT of torque on the screwdriver to get the screw moving. The first time I did this I was nervous that I would break the plastic, but I never did.
Delete