Showing posts with label electrical repair. Show all posts
Showing posts with label electrical repair. Show all posts
Thursday, April 9, 2020
Thursday, April 4, 2013
IKEA 12v Halogen Lamp Fix

IKEA is a great place to pick up stylish, inexpensive home items.
Vego and I have been shopping there ever since we met 20 years ago and it never disappoints. I think that IKEA has a particularly good lighting department. I browse this section of the shop often. Also, I am addicted to the "hurts" area, where display items, end-of-run, unpopular, returned or slightly damaged items come to rest (and rescue).
Some years ago, when they were relatively new, I picked up a nice HALOGEN lamp at IKEA. I then proceeded to use it for a bunch of years (like 10).
One day, it just up and quit on me. No power. No light. No fun.
Seeing as I had a TON of extra lighting lying around and in unopened boxes, I just placed another lighting unit in service, boxed this one up and tossed it into the "some day" pile.
Well, I have recently decided to get back into messing around with electronics after a 20+ year hiatus. But electronics either got a lot smaller in the last two decades, or my middle-aged eyes need a lot better lighting than they used to - and I'm not saying which!
Seriously, electronics is a LOT smaller now. These days I find myself working a lot with 1mm and 2mm die components. Tiny stuff. Surface mount stuff. Itsy-bitsy stuff. I could go on, but I won't. You get the idea. It's a micro world now.
The ambient lighting at my little nascent workbench is crazily inadequate. Partly, this is due to the fact that we have been forced to switch from incandescent to flourescent lighting, something I hate but have been putting up with because of the carbon footprint thing.
Now, flourescent lighting flickers like crazy. Believe me, your cones may not be able to tell everything is flickering because they are slower and responsible for discriminating colours, but your rods, which work in black & white and pull the majority of the edge detection duty in our vision system, are much, much faster and they are really under served by it, which is why contrast and depth perception are sucked out of flourescent-lit ambient environments.
Anyway, the bottom line is I now need a better light source, regardless of the reason. If I were I to be pressed to justify myself, I would say that I would prefer a lighting system that provides light wavelengths closer to sunlight, the environment in which our eyes evolved, than flourescent, for which they did not.
Flourescent is a weird shade of green, flickers, reduces 3D perception and washes everything out. It uses mercury and the bulbs are now considered toxic waste. The bulbs, secured as they are by only two pins in a bayonet arrangement, often fall out of their fixtures. I have a friend who lost an eye to a mis-loaded flourescent tube. The ballasts can leak really nasty oil. They often audibly buzz. When the capacitors go bad, they visibly flicker. Aside from these small consideration, flourescent is just great!
Cue halogen. It solves a lot of the above issues. It's also good for illuminating a small area because the bulbs are designed to put out reasonably coherent light with their integrated reflectors I need my light to be pretty focused because the stuff I'm working with is small.
So I guess today is "some day" for that busted IKEA 12v Halogen Lamp!
Fix Strategy
Light fixtures (even Halogen ones) are pretty simple. They are normally composed of:
- A Bulb
- A Fuse
- A Switch
- A Transformer
So I figured I'd just test each one in turn and find the bit that wasn't working right.
First, Test the bulb
Halogen bulbs use a filament, not a charged gas chamber like flourescent lighting. This means that Halogen bulbs can be tested with a multimeter. So the first thing I did was to pull out my trusty 10-year-old FLUKE 12B Multimeter and tested the bulb for resistance.
- INFINITE resistance = bad bulb
- ZERO resistance = good bulb
Well, well, well - the bulb showed ZERO resistance, which means that it is fine. Not bad for a 10 year old bulb. But then I noticed something wrong that the bulb was FAR OVER RATED for the fixture - WTF! The bulb was a 40W MR16 type bulb in a 20W MR16 type fixture.
How on earth did IKEA get away with selling a bulb 2X the rated wattage for the fixture?
No wonder it ran hot!
So I went ahead and dug a MR16 type 20W bulb out of a box of bulbs I have hanging around, tested it and installed it in the fixture, no problem. I tested it with a 12v DC "brick" type transformer that I had hanging around the house that was being used to powere something else.
NOTE: To test a Halogen bulb, use either 12v AC or 12v DC. Bulbs don't care. They also don't care about polarity.
OK, sigh with relief now that I'm not going to burn the house down.
But the IKEA 12v Halogen Lamp still doesn't work, even with a good bulb,
Second, Check the Fuse
The next logical thing to look for in this saga is to look for a blown fuse somewhere.
Now this thing is not a standard wall plug type light fixture, nor is it an "in the ceiling" type fixure.
It is a "Wall Wart" fixture that features a big lump of a transformer that plugs directly into the wall. It has a loooong wire with a dual blade thing at one end and a switched light fixture at the other end. This enables the manufacturer to swap out the transformer without needing to re-wire the fixture. OK, nice to know...but there is no place for a standard fuse to go.

The Transformer is held together with two TORX type screws. I used a T10 or a T12 screwdriver to open it up. Don't remember now which I used. Sorry.
Based on my experience with a thermally fused transformer in the TEFAL 8143 Hand Mixer / Blender Fix, I decided to have a look and see if my IKEA 12v HALOGEN LAMP also had a THERMAL FUSE installed in its transformer. They seem to be everywhere these days.
LO! I found a thermal fuse! Not exactly like what I'm used to seeing (I'm used to seeing a metal can, diode type packaging) but this thing is indisputably a fuse - I looked it up online. Thank you, Internet. Don't know how I used to do it without you.
AHA! INFINITE RESISTANCE! The culprit!
AHA! INFINITE RESISTANCE! The culprit!

Here, looking at the inside, we have two AC power leads coming in (red wires) the transformer on the right (220->12) and connector for the looooong wire between the transformer and the light fixture and finally an IC packaged SEFUSE, already removed from the guts of the windings of the transformer (buried as it was under tape and cardboard).

Seeing as this thing produces 12v AC, I thought that I might someday install a couple of posts to pull that kind of voltage (+12v, -12v) onto my test bench because that voltage will be useful for a lot of the stuff I plan to do.

Here's a pic of the new SEFUSE I bought to replace the cooked one. The new fuse is the one with the long leads. It's rated for a slightly higher "cooking" temperature but a smaller amperage, which is probably why it's a bit smaller.
Third, Check the Switch
Out of curiosity I thought I'd take a look at the switch.

Good thing I did. The switch lead BROKE OFF in the body of the fixture when I wiggled it.
Luckily, I had a suitably rated switch in a parts bin from one of my many visits to Ap Liu street. So it was a matter of about 30 minutes to tool the fixture to accept the new switch (which had a much bigger bore), solder in all the leads and so on. The new switch has a very natty RED button.

Crappy, low quality, broken switch lead here

Broken switch removed. Based on what happened when I attempted to pull the spade connector off the switch, I think the crystal matrix of the metal from which the switch had been manufactured had "set" over time. That or a bad curing period or a bad alloy recipe.

New switch installed and the fixture is now ready for the bottom cover to be replaced

Unit returned to service, mounted to test bench, on and working
Fixed.
TEFAL 8143 Hand Mixer / Blender Redux
Hello,
This is PART II of my hand mixer repair saga.
For some context, you may want to have a look at PART 1 first.
So I went off to the electronics store recently to buy parts to build a pair of Voltage Buffered Oscilloscope Probes for a Free Sound Card Based Oscilloscope I'm working on and a One Dollar i2c programmer I'm interested in building to help overcome the EEPROM based Power On Password and Supervisor Password protection of the IBM T30 and other IBM T-Series laptops.
While there, I picked up a THERMAL FUSE (SEFUSE) that is rated for a slightly higher temperature cutoff (130 degrees) than the original SEFUSE (113 degrees) installed in the TEFAL 8143 Hand Mixer.
Opening up the TEFAL 8243 Hand Mixer, here's what I saw:

The SEFUSE is soldered in line at the winding entry point, wrapped in a non-conducting material (a piece of the old chamois wash cloth left over from me setting up a soldering tip sponge in my soldering station) secured by a couple of tie-wraps, then tucked below the motor for safe-keeping:

Here's the unit I built. Slightly over-engineered, what?

As you can see, the gauge of the winding wires (seen against a white paper background for contrast) is something like #30. Really thin. Also enamel or varnish coated. A pain to solder.

Another quick view of the wiring in this puppy from a slightly further back perspective.

A selection of different types of fuse
The top is a standard BSA type fuse we find in the PLUGS here in Hong Kong. I never saw a fused plug before I got here, but in a way it makes sense. It also makes for HUGE PLUGS.
The middle fuse is the one that's going to go into this TEFAL 8143 Hand Mixer, rated for about the same current (10A) but about 10 degrees hotter than the one that blew. This is a dual-mode fuse, it will blow if too much CURRENT is drawn or if too much HEAT is generated.
The bottom is also an SEFUSE, but it's just been packaged in an IC format, probably for convenience when mounting on a circuit board. It's rated for a lower current but about the same temperature. These things are probably everywhere.

The new SEFUSE placed where it will eventually permanently reside.

I think I'll put it in the center of the mechanism. The plastic housing is domed and it just looks nicer.

Soldered in, taped down and ready to go. All that remains is to put it back together.
Now, much safer.
Done.
Sunday, February 24, 2013
Tefal 8143 Hand Mixer / Blender Fix
Scenario:
When making pizza dough one day (on the slowest setting) our TEFAL 8143 mixer just stopped working.
The blender is a TEFAL 8143 bundled with a few accessories, (whisk blades, dough knead blades, bowl).
One of the blades has a little plastic gearing integrated with it that mates to a plastic bowl, making it turn Both of these then fit into a large plastic assembly that puts everything together. When operating properly the blender blends and the bowl spins without the need for the user to hold them together.

First Link:
Doubt the supply of electricity from the panel.
In my case, I got glowing wires, so I moved to the next link of the troubleshooting chain.
Second Link:
Seeing as it was a British style plug (they are large, 3-pronged and have a fuse in them):

In my case, I got zero resistance. Yaay!
Put plug back together and optimistically plug in mixer / blender.
Nothing. Sigh.
Third Link:
Getting complicated now. We've eliminated everywhere else the problem could have happened but for inside the blender itself. It's time to think about opening up the blender / mixer and start messing with internals.
HUH? Funny little screws here - two are normal "star" or Phillips head, two are NOT. They look like a colon : has been pressed into the top of the screw head (I am to find out later these are called "M" type screws, and are used when the manufacturer does not want the consumer to open the appliance, typically because there are "no user serviceable parts inside").
Phillips screw head

M type screw head

I don't have this screwdriver.
Work comes to a complete halt.
Fourth Link:
Call TEFAL and ask what can be done about this situation.
They say there's an HKD80 / USD10 dollar charge to just accept the unit for inspection.
Moreover, any other parts are extra
This entire process could take up to a week
SIMPLY INTOLERABLE!
THAT'S MONEY THAT COULD GO TO BUYING IMPORTANT STUFF...LIKE TOOLS! :)
The appliance costs about HKD500 / USD62.00 new.
The repair charge could easily come up to HKD200 / USD25.00
That's about 40% of the cost of just buying a new one (which would come with a warranty).
Fifth Link:
Off to local electronics mecca (Ap Liu Street).
Poked around for about two hours.
Found an "M" size screwdriver that fits the screw in the mixer / blender for HKD13 / USD1.75.

Bought "helping hands" soldering station for HKD40 / US5.00.
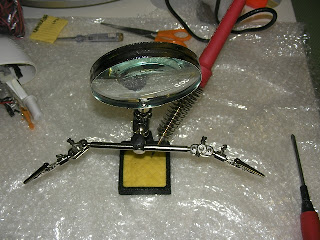
Also bought a bunch of unrelated goodies for other, upcoming projects and to goof around the house with (de-soldering pump, banana plugs, jigsaw blades, tweezers, and so forth).
Sixth Link:
Returned home.
Showed new tools to wife for obligatory appreciative noises (wives are just great!)
Proceeded to opening up TEFAL blender / mixer 8143
Got the FLUKE multimeter on the case:
Puzzlement and perplexity! Power is making it ALL THE WAY to the motor windings, which is a 50/60HZ 220VAC rated unit. Personally I was pretty sure that the problem was going to be early in the power distribution / supply in this unit. I was thinking along the lines of maybe a bad rectifier diode (blown open) or a blown up capacitor.
There's nothing much in this appliance aside from the motor and a rotary type control switch.. Just a few assorted resistors and little ceramic caps (all of which looked fine). Due to the design of the motor, there ISN'T a rectifier circuit. WTF? Uh-oh. Looks like maybe something even more worst-case happened...like we blew one of those little fine wires in the stator of the motor.
Maybe there's a short circuit somewhere in there? The motor assembly is replete with LOTS of little, hair-thin wires, most of which are linked to the six-position switch that introduces 220V into different stages of the stator winding, which probably serves to give it a multi-speed capability, maybe with a resister network somewhere to drop the AC. But a short would just make the switch irrelevant and the motor not change speed...not utterly kill the unit...unless the wires melted when they shorted.
Stator built like a normal transformer, stamped metal layers stacked together and then wound with ultra fine (22 gauge or higher) unshielded wire.
Nothing special there.

Guess it's time to flick the Fluke multi-meter over to resistance and start looking for where the broken lead might be. God, I hope it's not in the center of the winding.
Unplug unit and start probing...
Windings all look OK, but there's something weird about the first one after the power entry. Doing all of these tests in-circuit can be tricky because current from the meter flows all over the place and can give weird results rather than testing discrete components. Hmmm. Well, how about removing the tape around the center of the rotor (the above shows the tape already removed) to get a better idea of where these little hair-thin wires are going?
AHA! Under TWO layers of paper lurks what looks suspiciously like a diode!

Silver can type and completely camouflaged from view....let's have a closer look.

Well, well, well.. It's not a diode. It's a FUSE!
And guess what? Infinite resistance. Watson, I think we've found our man!
But WHY is this fuse located in the (literally) last place someone would look for it? Does it it also have a thermal cutoff feature in case the motor gets too hot?
[ed: As it turns out...yes]
Pull out soldering iron. Now you know why I bought that soldering station, to unsolder two leads... :)

Assemble a new fuse holder from a couple of extra, broken British style plugs bouncing around in the parts bin and some speaker wire. My choices for fuses to put in the holder are 3A, 5A and 13A so I go for the highest value.

Wrap the new assembly in insulating material secured by tie wraps (just in case, for anti-vibration) and tuck the entire thing into cavity found in blender / mixer body. Pigtail, then solder leads. Insulate everything in sight from each other with white electrical tape.

Re-assemble unit with Phillips and "M" style screwdrivers.
Test.
Works
Gonna go make oatmeal cookies now... :)
http://allrecipes.com/recipe/soft-oatmeal-cookies

AFTERWORD: I have since determined that the FUSE that was in my unit was an SEFUSE (Thermal Fuse) designed to cut out at 113 degrees centigrade. Apparently the motor in this unit runs pretty HOT (ergo, the little integrated plastic fan off of the end of the rotor).
Well, the 13A fuse I put into the unit is NEVER going to blow due to too much current being pulled by the motor (the plug fuse is only 3A), and it will *never* blow due to heat, so I think I'll just open up this little mixer and put a 3A fuse (or lower) in there some day. The fuse in the plug is rated at 3A. Also, I think that we'll stay away from lower RPM settings when mixing thick stuff as the current draw is probably the reason why the motor heated up causing the fuse to blow. OR, I'll put in a thermal cutoff that actually resets once it cools, instead of the one shot wonder that TEFAL put in there. A fuse costs about USD0.50, a thermal cutout about USD1.50.
I wonder how much "service call revenue" (and landfill) this dollar difference has caused over the years...
UPDATE: After thinking about it a little bit, I have decided that the thermal cutout protection is the real reason why that fuse was where it was, not the current protection (after all the plug fuse is 3A). So I will be pulling out my "industrial strength" hand made fuse and putting in the little tin can fuse.
FINAL: I replaced the fuse with another, slightly higher temperature rated unit. Read all about it at TEFAL 8143 Hand Mixer / Blender Redux
When making pizza dough one day (on the slowest setting) our TEFAL 8143 mixer just stopped working.
The blender is a TEFAL 8143 bundled with a few accessories, (whisk blades, dough knead blades, bowl).
One of the blades has a little plastic gearing integrated with it that mates to a plastic bowl, making it turn Both of these then fit into a large plastic assembly that puts everything together. When operating properly the blender blends and the bowl spins without the need for the user to hold them together.

Problem was, it stopped spinning
First Link:
Doubt the supply of electricity from the panel.
- Test socket with another appliance (like a toaster).
- Wires glowing red inside the toaster = power OK.
- No glowing red wires inside the toaster = check the breaker.
In my case, I got glowing wires, so I moved to the next link of the troubleshooting chain.
Second Link:
Seeing as it was a British style plug (they are large, 3-pronged and have a fuse in them):

- Disassemble plug
- Test fuse with my FLUKE multimeter.
- Zero resistance = fuse OK.
- Infinite resistance (OL) = fuse blown.
In my case, I got zero resistance. Yaay!
Put plug back together and optimistically plug in mixer / blender.
Nothing. Sigh.
Third Link:
Getting complicated now. We've eliminated everywhere else the problem could have happened but for inside the blender itself. It's time to think about opening up the blender / mixer and start messing with internals.
HUH? Funny little screws here - two are normal "star" or Phillips head, two are NOT. They look like a colon : has been pressed into the top of the screw head (I am to find out later these are called "M" type screws, and are used when the manufacturer does not want the consumer to open the appliance, typically because there are "no user serviceable parts inside").
Phillips screw head
M type screw head
I don't have this screwdriver.
Work comes to a complete halt.
Fourth Link:
Call TEFAL and ask what can be done about this situation.
They say there's an HKD80 / USD10 dollar charge to just accept the unit for inspection.
Moreover, any other parts are extra
This entire process could take up to a week
SIMPLY INTOLERABLE!
THAT'S MONEY THAT COULD GO TO BUYING IMPORTANT STUFF...LIKE TOOLS! :)
The appliance costs about HKD500 / USD62.00 new.
The repair charge could easily come up to HKD200 / USD25.00
That's about 40% of the cost of just buying a new one (which would come with a warranty).
Fifth Link:
Off to local electronics mecca (Ap Liu Street).
Poked around for about two hours.
Found an "M" size screwdriver that fits the screw in the mixer / blender for HKD13 / USD1.75.

Bought "helping hands" soldering station for HKD40 / US5.00.

Also bought a bunch of unrelated goodies for other, upcoming projects and to goof around the house with (de-soldering pump, banana plugs, jigsaw blades, tweezers, and so forth).
- Resisted temptation to buy a regulated power supply.
- Resisted temptation to buy an oscilloscope.
- Actually succeeded.in my resistance :)
Sixth Link:
Returned home.
Showed new tools to wife for obligatory appreciative noises (wives are just great!)
Proceeded to opening up TEFAL blender / mixer 8143
Got the FLUKE multimeter on the case:
- Trace path of 220VAC to see how far along the power was making it into the unit
- Took note of anxious noises from wife who is alarmedly watching me poking metal probes into an opened up, plugged in blender.
- Sincerely promise that I will be very careful to avoid electrocution.
- Am even more careful from then on. Left hand in pocket.
Puzzlement and perplexity! Power is making it ALL THE WAY to the motor windings, which is a 50/60HZ 220VAC rated unit. Personally I was pretty sure that the problem was going to be early in the power distribution / supply in this unit. I was thinking along the lines of maybe a bad rectifier diode (blown open) or a blown up capacitor.
There's nothing much in this appliance aside from the motor and a rotary type control switch.. Just a few assorted resistors and little ceramic caps (all of which looked fine). Due to the design of the motor, there ISN'T a rectifier circuit. WTF? Uh-oh. Looks like maybe something even more worst-case happened...like we blew one of those little fine wires in the stator of the motor.
- Unplug unit.
- Try to turn the gears inside the unit by hand.
- No problem, so it's not jammed.
Maybe there's a short circuit somewhere in there? The motor assembly is replete with LOTS of little, hair-thin wires, most of which are linked to the six-position switch that introduces 220V into different stages of the stator winding, which probably serves to give it a multi-speed capability, maybe with a resister network somewhere to drop the AC. But a short would just make the switch irrelevant and the motor not change speed...not utterly kill the unit...unless the wires melted when they shorted.
Stator built like a normal transformer, stamped metal layers stacked together and then wound with ultra fine (22 gauge or higher) unshielded wire.
Nothing special there.

Guess it's time to flick the Fluke multi-meter over to resistance and start looking for where the broken lead might be. God, I hope it's not in the center of the winding.
Unplug unit and start probing...
Windings all look OK, but there's something weird about the first one after the power entry. Doing all of these tests in-circuit can be tricky because current from the meter flows all over the place and can give weird results rather than testing discrete components. Hmmm. Well, how about removing the tape around the center of the rotor (the above shows the tape already removed) to get a better idea of where these little hair-thin wires are going?
AHA! Under TWO layers of paper lurks what looks suspiciously like a diode!

Silver can type and completely camouflaged from view....let's have a closer look.

Well, well, well.. It's not a diode. It's a FUSE!
And guess what? Infinite resistance. Watson, I think we've found our man!
But WHY is this fuse located in the (literally) last place someone would look for it? Does it it also have a thermal cutoff feature in case the motor gets too hot?
[ed: As it turns out...yes]
Pull out soldering iron. Now you know why I bought that soldering station, to unsolder two leads... :)
- Remove fuse from circuit.
- Test as discrete component.
- We still have infinite resistance, the fuse is truly blown.
Wow. This is a 10A fuse at 220V. That's a LOT of juice.
Assemble a new fuse holder from a couple of extra, broken British style plugs bouncing around in the parts bin and some speaker wire. My choices for fuses to put in the holder are 3A, 5A and 13A so I go for the highest value.

Wrap the new assembly in insulating material secured by tie wraps (just in case, for anti-vibration) and tuck the entire thing into cavity found in blender / mixer body. Pigtail, then solder leads. Insulate everything in sight from each other with white electrical tape.

Re-assemble unit with Phillips and "M" style screwdrivers.
Test.
Works
Gonna go make oatmeal cookies now... :)
http://allrecipes.com/recipe/soft-oatmeal-cookies

AFTERWORD: I have since determined that the FUSE that was in my unit was an SEFUSE (Thermal Fuse) designed to cut out at 113 degrees centigrade. Apparently the motor in this unit runs pretty HOT (ergo, the little integrated plastic fan off of the end of the rotor).
Well, the 13A fuse I put into the unit is NEVER going to blow due to too much current being pulled by the motor (the plug fuse is only 3A), and it will *never* blow due to heat, so I think I'll just open up this little mixer and put a 3A fuse (or lower) in there some day. The fuse in the plug is rated at 3A. Also, I think that we'll stay away from lower RPM settings when mixing thick stuff as the current draw is probably the reason why the motor heated up causing the fuse to blow. OR, I'll put in a thermal cutoff that actually resets once it cools, instead of the one shot wonder that TEFAL put in there. A fuse costs about USD0.50, a thermal cutout about USD1.50.
I wonder how much "service call revenue" (and landfill) this dollar difference has caused over the years...
UPDATE: After thinking about it a little bit, I have decided that the thermal cutout protection is the real reason why that fuse was where it was, not the current protection (after all the plug fuse is 3A). So I will be pulling out my "industrial strength" hand made fuse and putting in the little tin can fuse.
FINAL: I replaced the fuse with another, slightly higher temperature rated unit. Read all about it at TEFAL 8143 Hand Mixer / Blender Redux
Subscribe to:
Posts (Atom)